 how-to
How to Remove Fine Construction Dust: 2026 Guide
Table of Contents
- Why Fine Construction Dust Is Different From Regular Dust
- Tools and Protective Gear You Need for Construction Dust Removal
- Step-by-Step: How to Remove Fine Construction Dust From Top to Bottom
- Choosing the Best Vacuum for Construction Dust
- How to Protect HVAC Systems During Renovation
- Post-Construction Cleaning Checklist for Every Room
- Common Mistakes That Leave Dust Behind
- Conclusion: Getting Units Truly Move-In Ready
- Frequently Asked Questions
Last Updated: September 22, 2026
Why Fine Construction Dust Is Different From Regular Dust
Fine construction dust is not the same as household dust, and treating it that way is the most common reason units fail a final walkthrough. Drywall dust and silica dust carry particles small enough to stay airborne for hours, settle on every surface, and slip past standard vacuum filters. This guide from Squeaky Clean Plus covers how to remove fine construction dust the way property teams actually need it done: fast, in sequence, and without a callback.
Tools and Protective Gear You Need for Construction Dust Removal
The right kit is short and specific. You do not need a cart full of products. You need gear that captures particles instead of spreading them.
Protective gear:
- A respirator mask rated for fine particulate matter
- Safety glasses to keep dust out of your eyes
- Disposable gloves
- Boot covers or dedicated work shoes
Cleaning tools:
- A vacuum with a true HEPA filter
- Microfiber cloths, several per room
- Two buckets: one for a vinegar solution, one for rinse water
- A tack cloth for final surface prep
- Plastic sheeting and tape for doorways
Step-by-Step: How to Remove Fine Construction Dust From Top to Bottom
The sequence is the whole game. Dust falls, so you clean from the highest point down and never go back up. Follow these steps in order.
Step 1: Prep the Space and Set Up Negative Airflow
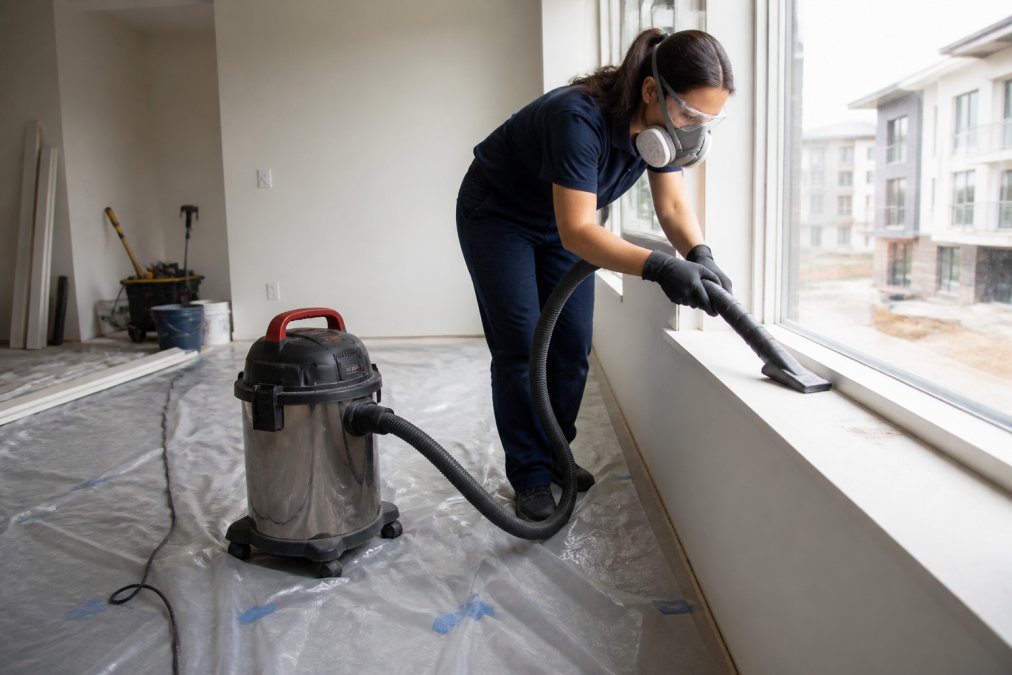
Seal doorways with plastic sheeting before you touch anything. Tape off vents and open a window on the far side of the room. If you have an air scrubber, run it now. Negative airflow keeps dust from drifting into clean hallways and neighboring units.
Step 2: Vacuum All Surfaces With a HEPA Filter
Start at the ceiling and work down. Vacuum light fixtures, corners, window frames, and sills. Then move to walls, trim, and finally floors. Use slow, overlapping passes. Fast strokes leave fine particulate matter behind.
Step 3: Damp Wipe Walls, Ceilings, and Trim
Damp wiping beats dry dusting every time on fine dust. A barely damp microfiber cloth grabs particles instead of launching them.
- Wipe ceilings and upper walls first
- Move to trim, baseboards, and door frames
- Finish with window sills and tracks
- Use a fresh cloth for non-porous surfaces like tile and glass
Choosing the Best Vacuum for Construction Dust
The best vacuum for construction dust is a HEPA-filtered unit with strong suction and a sealed system. Without those three traits, you are just moving dust around the room.
What to look for:
| Feature | Why It Matters |
|---|---|
| True HEPA filter | Traps fine particulate matter instead of releasing it |
| Sealed system | Keeps dust from escaping through gaps and seams |
| Strong suction | Pulls dust from deep in carpet and cracks |
| Washable filter | Lower running cost on long renovation jobs |
| Hose and brush tools | Reaches trim, vents, and tight corners |
How to Protect HVAC Systems During Renovation
Before demo begins:
- Turn the system off at the thermostat and, if accessible, at the disconnect so it cannot cycle on mid-task.
- Seal every supply and return vent with plastic sheeting and painter's tape. Tape the plastic to the grille frame, not the drywall, so you do not pull paint at removal.
- Close and tape off the filter slot if the return is a central wall or ceiling grille.
- If the building has a shared system, notify the property manager so adjacent units are not pulling your dust.
During the clean:
- Keep the system off. Running it during vacuuming or damp wiping just re-aerosolizes what you have already captured.
- If you must run air for worker comfort, use a portable air scrubber with a HEPA filter inside the work zone rather than the building system.
- Watch for negative pressure. Sealing every vent can starve the return and pull dust through door gaps and electrical chases. A portable scrubber avoids that problem.
After the clean:
- Replace the HVAC filter once work stops, not before. A filter loaded with drywall dust restricts airflow and can trip a high-limit switch on the furnace.
- Match the filter to the system. A MERV 8 to MERV 11 pleated filter is a common choice for post-construction cleanup because it captures fine particulate without choking airflow. Higher MERV ratings capture more but raise static pressure, and many residential blowers are not rated for them.
- Run the system on fan-only for a short cycle, then check a supply register with a white cloth. Gray residue means the ducts need attention.
- If the ducts were open during the work, schedule a duct cleaning before move-in. Dust that settled in the trunk line will recirculate for weeks and trigger tenant complaints.
For guidance on indoor air quality and filtration standards, the U.S. Environmental Protection Agency indoor air quality resources is a solid reference.
Post-Construction Cleaning Checklist for Every Room
Use this post-construction cleaning checklist as your final pass. It keeps crews consistent across units.
- Ceilings and light fixtures vacuumed and wiped
- Walls wiped top to bottom with a damp cloth
- Trim, baseboards, and door frames cleaned
- Window sills, tracks, and frames wiped
- Vents and registers cleaned and re-sealed
- Cabinets and drawers vacuumed inside and out
- Fixtures, counters, and non-porous surfaces wiped
- Floors vacuumed, then damp mopped
- Final white-cloth test on three random surfaces
Common Mistakes That Leave Dust Behind
Most failed cleans trace back to a handful of repeat errors. Fix these and your results improve fast.
- Dusting before vacuuming. This spreads dust instead of removing it.
- Skipping the ceiling. Dust falls, so an uncleaned ceiling undoes your floors.
- Reusing dirty water. Gray water leaves surface residue behind.
- Forgetting vents and ducts. These recirculate dust after you leave.
- Rushing the final pass. Fine dust settling takes time. Clean, wait, then check.
The mistake almost every guide skips: not identifying what the dust actually is
Before you pick a tool or a cleaning agent, identify what you are cleaning up. Two dust types dominate renovation work, and they require different protocols.
The second skipped mistake: never cleaning the vacuum
Fine construction dust clogs filters fast. A HEPA vacuum that pulled drywall dust all day is now a dust source, not a dust remover. After every job:
- Empty the canister or bag outdoors, away from doorways and air intakes.
- Remove the HEPA filter and check it against a light. If you cannot see light through it, replace it. Most manufacturers publish a filter life in hours, and drywall dust shortens that significantly.
- Wipe the inside of the canister and the hose with a damp cloth. Dust that clings to the hose re-enters the air on the next job.
- Check the seals and gaskets. A worn gasket lets fine dust bypass the filter entirely.
- Store the vacuum with the filter removed and the canister open so it dries and does not grow odor.
The white-cloth test is your fastest quality check. Wipe a random surface with a clean white cloth. Any gray residue means that zone needs another pass.
Conclusion: Getting Units Truly Move-In Ready
Fine dust is stubborn, and a rushed final clean costs more than it saves. Lost showings, tenant complaints, and re-cleans add up fast.
Frequently Asked Questions
How long does it take for construction dust to settle after a remodel?
Most airborne dust settles within 24 to 48 hours after active work stops, but fine particles can stay suspended for days without ventilation. Running air scrubbers and keeping HVAC systems sealed during the project speeds this up. After the work ends, wait at least 24 hours before final cleaning so you are not chasing dust that is still floating. For a full unit turnover, plan your construction dust removal at least one day after the last trade leaves the site.
Can I use a regular vacuum for construction dust removal?
No. A standard household vacuum will blow fine particles straight back into the air through its exhaust. You need a vacuum with a HEPA filter rated for fine particulate matter, plus a sealed system so dust does not leak around the canister. Shop vacs with HEPA cartridges work for small jobs, but for post-construction cleaning across multiple units, a commercial HEPA vacuum is the right tool. Regular vacuums also clog quickly and can overheat when pulling drywall dust.
What safety precautions should I take when cleaning construction dust?
Wear a NIOSH-approved respirator mask (N95 or P100), safety glasses, and gloves. Silica dust from concrete, drywall, and joint compound is a known respiratory hazard, so never dry sweep or use a leaf blower indoors. Set up negative airflow with a fan blowing out a window and seal off HVAC vents before you start. If the space had lead paint or asbestos, stop and call a certified abatement professional before any cleaning begins.
How often should I change HVAC filters after construction?
Change the HVAC filter immediately after construction ends, then again 2 to 4 weeks later. During heavy renovation, check the filter weekly and replace it when it looks gray or clogged. Use a MERV 11 to MERV 13 filter for post-construction cleaning; higher ratings can restrict airflow in older systems. If you skipped sealing the vents during the project, have an HVAC technician inspect the ducts before you turn the system back on.